1993 Honda Del Sol electric car
conversion. Webpage loading.....
The most up-to-date info is at the BOTTOM!
This
website is a cache of a forum thread on smartcar451.com that outlines
my conversion of a 1993 Honda Del Sol to electric power! If your on
dialup, you should'nt be! All the content is in one place down below.
As time permits a REAL website should be made. If
you wish all the pictures and more can be listed in a gallery here:Honda Del
Sol EV conversion
Posted: Tue Mar 8th, 2016 02:33 pm
Today marks 5,000 miles since the conversion to the AC motor from DC. Wow, I wish this motor was available 3 years ago.
I am noticing an increased interest at my local STARBUCKS during my normal "show and tell" times.
Posted: Fri Mar 25th, 2016 12:21 am
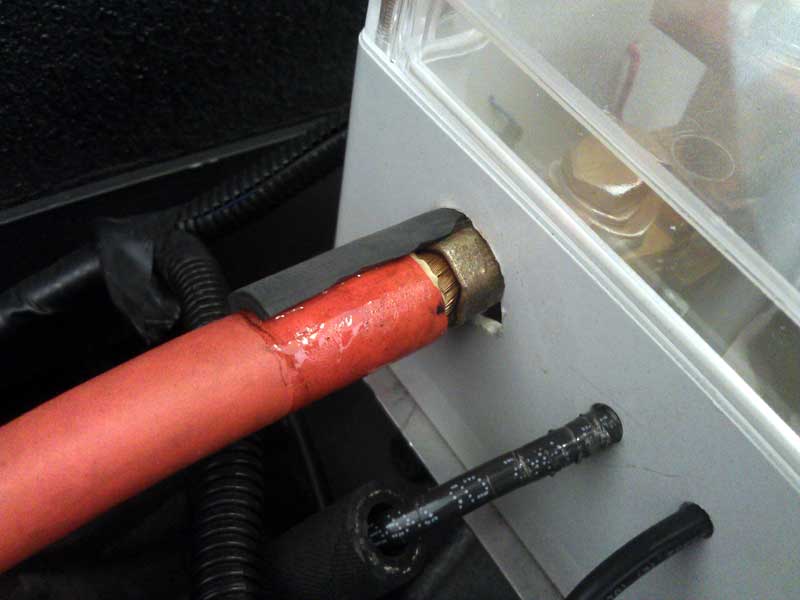
Yesterday
I decided to replace a piece of heatshrink on one of the battery cables
entering the electrical box. The picture if after I tore the piece of
heatshrink off that was dangling. I think what happened is because I
cut down the heatshrink ever so slightly to fit the hole I already had
in the box it weakened it. I misjudged the heatshrink thickness EVWEST
used versus the stuff I use. No big deal and I had enough of the
thinner heatshrink I use to replace it.
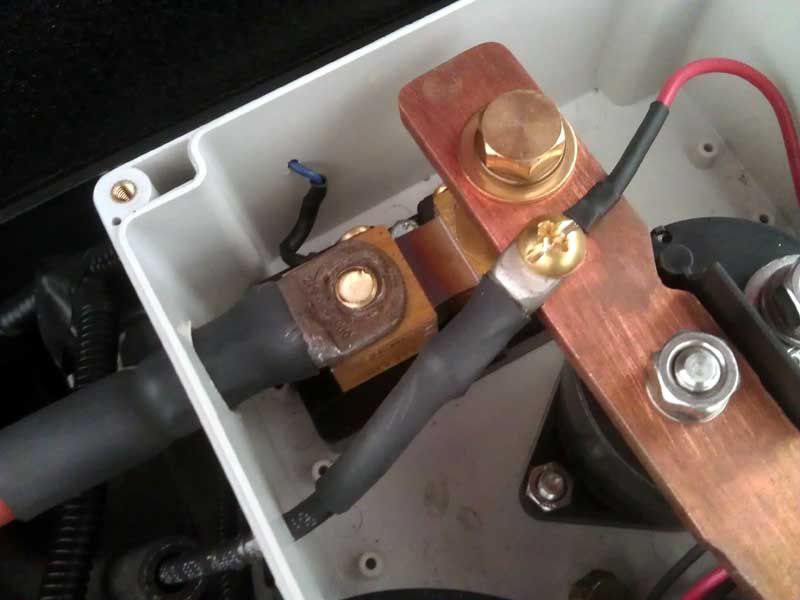
So
I put a new piece on. Everything was going well until the brass bolt
snapped off in the shunt. I didn't use much force so I wondered what
happened. Luckily I had the original bolt from the other side before I
had to use an extended one for the brass spacer to the copper bar. But
it wasn't going to be an easy removal as the threads where in the cable
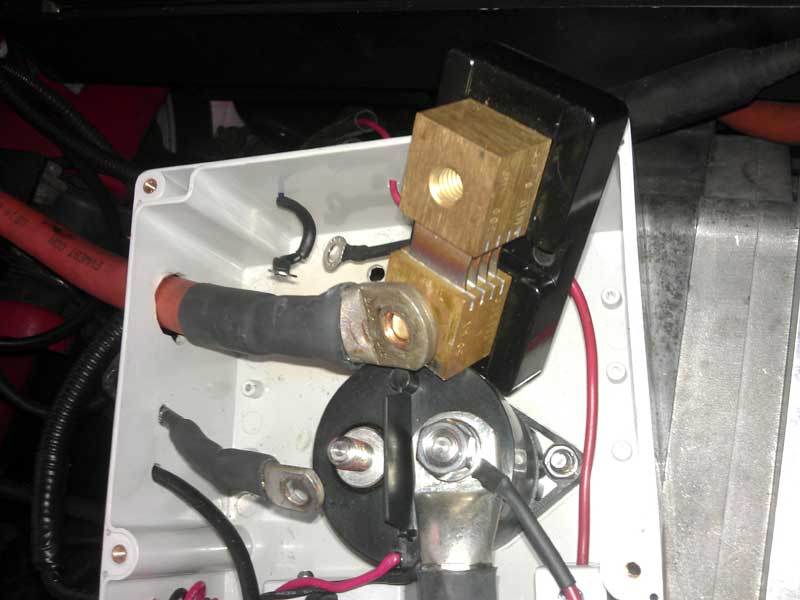
lug attachment which I had thought I would be cute and threaded. So to
get it out meant taking the shunt out of the box so I could spin the
entire shunt on the cable to remove it. I also wanted to do it this way
because I wanted to retain as much threads on the snapped bolt as I
could to extract with a set of VISE-GRIPS.
While installing the
new bolt it the threaded cable lug and then into the shunt I could
never get the treads to "line up" and it would always bottom out on the
shunt threads before the lug on the cable. Now I know I got this right
once and everything tightened down securely, but now it wont line up.
So I made the call and filed the threads out of the lug so the bolt
passes right through. Everything tightened up perfectly. I then looked
closely at the shunt and noticed some "blueing" on the side where the
cable came into the box. This is caused by heat. What I think was
happening was since the cable was rigidly mounted to the bolt it was
ever so slightly loosening up causing micro arcing.
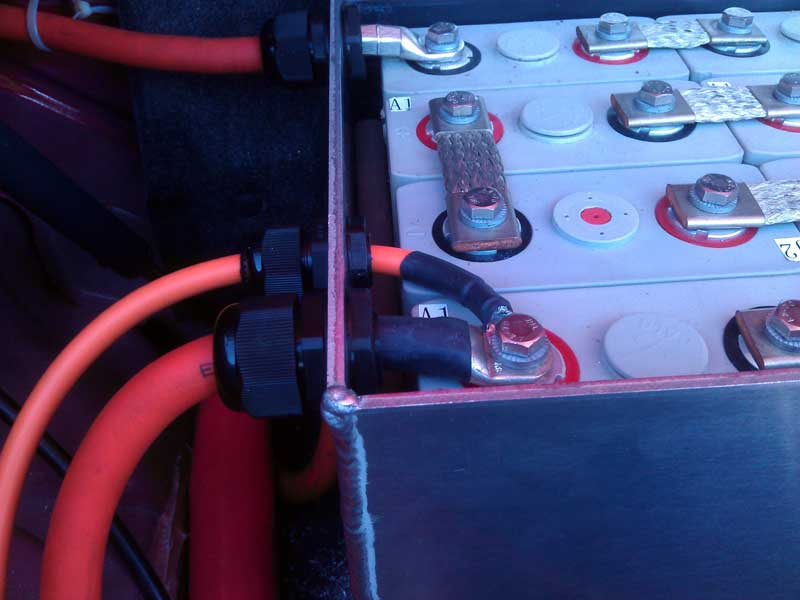
Look on the right side of the shunt fins after I extracted the bolt: 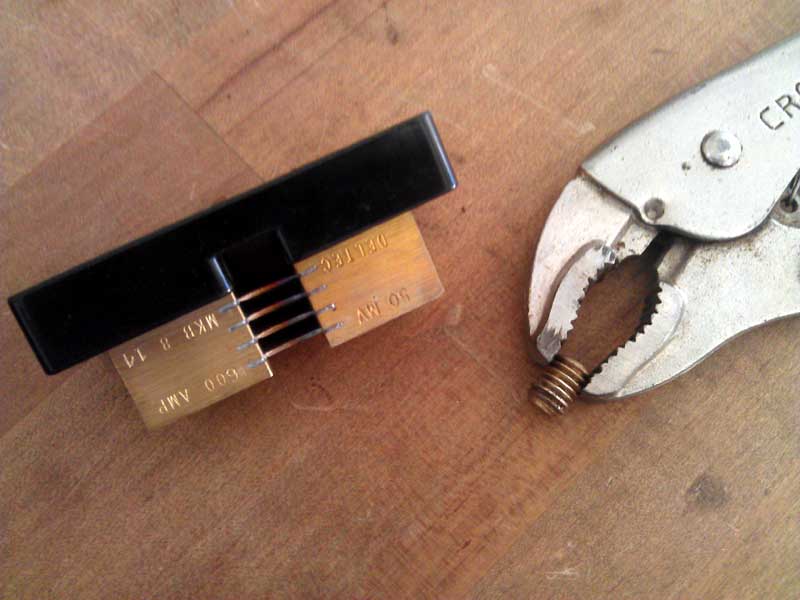
So
I am glad that everything is back up and running. It was a couple hour
job because I had to take the electrical box out to get behind it and
remove the nuts that held the shunt on.
Posted: Fri Apr 8th, 2016 08:11 pm
Nothing
much to report! @ 88,900 miles I needed to replace the front pads. This
is the first time having to do this, as the last reported pad
replacement was somewhere around 40,000 miles and 7+ years ago. I
replaced them with some lifetime warranty O'Rielly ceramic pads. I
didn't really care what they where. Long term I would love to upgrade
the rotors to larger ones from a different Honda/Acura model.
What
else? Hmm well TESLA absolutely astounded with the Model 3 reveal a few
days ago. This is an amazing company that is building some top notch
cars, let alone electric ones. http://www.tesla.com Make no mistake
about it this is going to be the electric car that changed the entire
scene for everyone. Most notably other car manufactures.
I am continuing to display the car wherever I go.
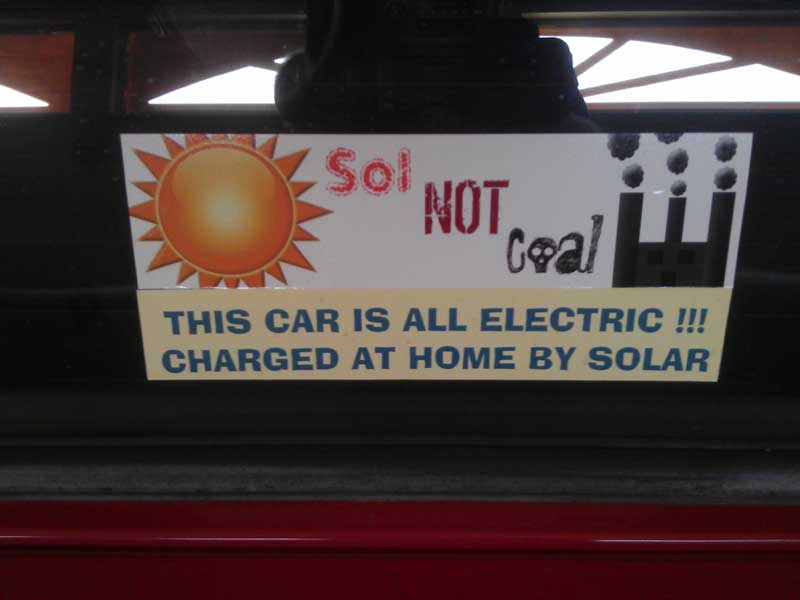
That
rear window sticker needed something to compliment it as not to come
across snooty. When I saw this sticker online I thought it was so
fitting. And I am getting more friendly waves from other cars. Sol Not
Coal. Double meaning here. Obviously the vehicle is a Honda Del Sol,
but along with that sol means sun. And since the car is always
recharged with with solar power , its perfect.
A
while back Jack Rickard from EVTV had a fire from a unbalanced battery
pack recharge. Since then he got a utility jobsite metal storage crate
that he houses his experiments in. If it catches on fire he can wheel
it out of the garage and let it burn.
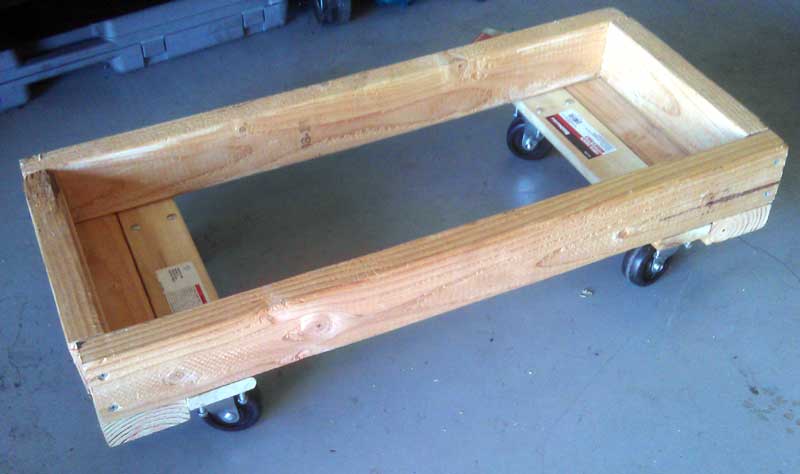
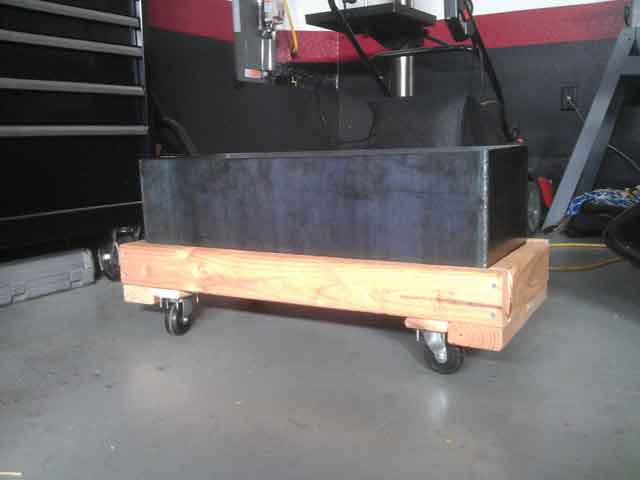
I had spare time and spare
parts in the garage I needed to get rid of. OK this is just freetime
stuff that serves no purpose other then occupy time. So this is my
version of the rolling steel shop cart. I am going to throw some spare
batterys and the old Warp9 motor in it for the meantime.
First
off I had a 10ft 2x4 left over from a house remodel. Then I had that
steel box I originally had made for the trunk of the car before opting
for a much lighter aluminum one. I had everything I needed except
wheels. And when I sourced wheels at a local Harbour Frieght the total
came to something like $25.00. So the idea fell by the wayside. Then a
friend told me about some wooden 4 wheel dollys Harbour Frieght had for
$7.99 with nice wheels rated to 1000lbs. And in true Harbour Frieght
fashion a FREE LED flashlight! So I bought one, tore it apart, used a
couple of the wooden pieces that I cut down, drilled 2 new holes, etc,
etc.
Posted: Thu May 5th, 2016 03:21 pm
I have been playing around with the battery and charging counts.
The
model Elcon charger I have was originally purchased for the battery
pack when it was sized for the DC motor. I think the charge voltage was
like to 203v or something...been so long. Because of that higher
voltage the PFC 2500 charger I got only charges at 12amps for the (now)
171.5v termination point. Also the algorithm that was loaded has a ramp
down before it is terminated. To get around this, I set the charger for
1 higher battery count then I actually has and then kill the enable
signal with the JLD404 meter. This way I can terminate the charge in 1v
increments instead of 3.5v cell counts with the charger. I feel like I
talked about this before.
I had 49 cells terminating the charge
at 167v, now I added 1 cell and charged to 171.5v. I am going to give
it a few days and try another cell. It's going to get to a point though
that the controller will not come on and it will throw a overvoltage
code.
The car just turned 90,000 miles. So thats about 1100 miles in less then a month judging by my last post.
Posted: Fri May 27th, 2016 12:56 pm
OK
so 51 is going to be the magic number of battery's I stick with. I
tried more but the controller started shutting going down the road, and
I had to pull over and turn the headlights on to drain the power from
the pack.
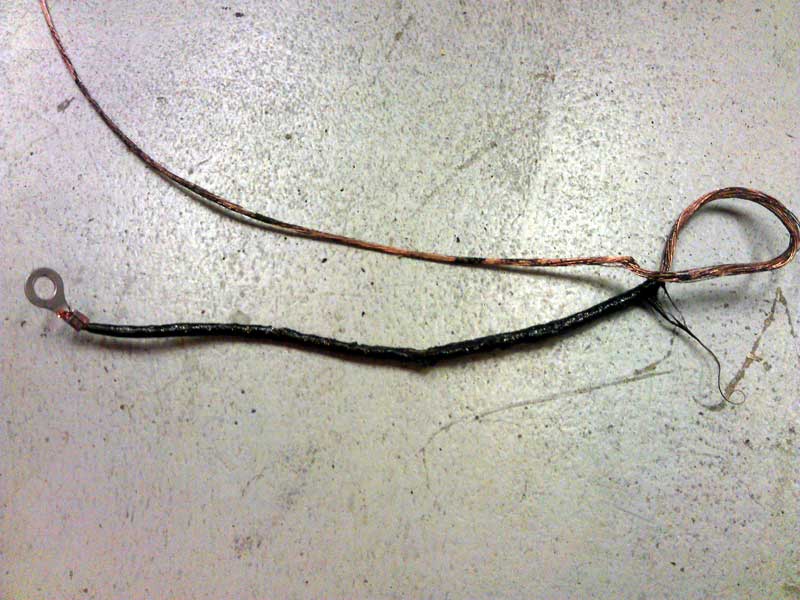
I went back to a motorcycle battery for the 12v
system. It wasn't planned but while re positioning the 12v lead battery
in the underhood box I pulled the wires to tight and it rubbed up again
the metal box. Smoke ensued and within a half second I went apeshit and
started ripping off all the wires I could find. I actually have really
good video of this happening, as soon as I find something to convert
the video from H264 codec I will show it.
The only thing
"damaged" in the process was the diode I had installed for the DC/DC
converter. I have consulted with Michael @ EVWEST and he believes that
the diode was really only a solution to a problem DC systems had, not
the AC.
Of course like clockwork, having a small 12v battery
already bit me. I was at my local gas station around dusk getting
energy drinks. I spent an unusual amount of time inside talking to the
attendant. When I came outside I saw the rear light was on. I never
turned off the lights. And of course I go to turn the ignition on and
nothing. A quick 12v jump got the DC/DC converter back up and I was on
the road again.
I went home, charged the 12v battery and I assume everything is bitchin wee wee.
Posted: Sat May 28th, 2016 11:48 am
As promised: http://www.techvelocity.com/panicatthedisco.avi

My burns are healing nicely.
Posted: Sun May 29th, 2016 10:54 pm
I
was driving around today and heard what sounded like a "pop" from under
the car. I lost all power and fortunately enough I was close to my
parents house and had my Dad tow the car to their house with a 10,000lb
strap.
Each of the 3 battery packs have voltage but its only
reading 20-23v at the shunt underhood. I measured each cell and they
are all @ 3.32. Only 13AH was removed from the pack at the time. I
tested the continuity of the 1 fuse I have in the high voltage pack and
it was OK.
So I will begin to work on it again tomorrow. I will bring a couple extra batterys with me just in case.
Comically (or not so much) my 12v battery short video has caused a jump in website visits. Your all sick I tell you!
Posted: Mon May 30th, 2016 08:33 pm
Today
I picked and prodded around the car trying to find anything out of
place. At this point I am going to point to one or more of the
battery's as being the issue.
So to prepare for bottom balancing
for the THIRD time, I removed all the batterys in the car. I have 11
"spare" cells that where removed when I converted from DC to AC drive.
So
tomorrow I will begin to drain the cells down to 2.75v. It's not a
straight forward drain to that voltage and go. The cell's bounce back
up and recover. If you drained to 2.75v each time you would be trimming
the voltage off forever to get it stable. It's widely accepted that the
FIRST time you drain the battery you drain to 2.5v and allow it to
recover overnight. And then drain it to 2.75v. It's a tedious process.
What I am hoping is that when I drain the batterys it should immediately become evident the problem cells.
And I updated the post above to show the wire that burned and my hand. Since I guess it's kind of a "thing".
Posted: Tue May 31st, 2016 09:32 pm
I
found a battery with some molten metal at the positive post. This was
an indication of a loose terminal. It was from one of the batterys
underhood so it is possible I missed tightening one.
With that bit of information I decided to put all the batterys back in the car and see if that made a difference, it did not.
So
tomorrow I will remove the batterys again and see if I can get a
current reading of all the batterys strapped together on the garage
floor. If I do not get a pack sized voltage reading of around 160v I
will then backtrack through the pack until I hopefully find it.
Not
being able to load that batterys is a disadvantage at the moment. That
is the preferred method of weeding out the weak one/'s.
Posted: Sun Jun 5th, 2016 12:22 am
Draining
each individual battery is going to take far to long. I need to find
another solution. Probably involving hooking the batterys up to the car
and using the motor and DC/DC converter to help drain the pack down.
Posted: Sun Jun 12th, 2016 08:01 pm
Well that was fun.
I decided that hooking up and using the motor to drain the batterys was the best solution.
So
I hooked up all the batterys outside the car and went to turn it on. A
huge bang was head and a mini plazma fireball was seen.
The
controller had blew a flame out the back. And a couple of battery's got
taken out because in my haste I didn't bother fusing the high voltage
wires.
So at this point I am going to say it was the controller
the whole time. Not any wiring or something grounding out. I am
thinking on how to proceed. The 2 batterys is no big deal, I have
extra. The controller however is a different story.
I will have more ruin porn pictures for everyone as I find time.
Posted: Tue Jun 14th, 2016 01:59 pm
I checked the high voltage fuse and it was indeed blown. That was probably the popping sound I heard.
I
called HPEVS today and spoke with Brian. I let him know what was going
on and he agreed it was a controller problem. I read him the serial
number on the controller and he said to bring it by tomorrow. The most
likely scenario is they would just replace it.
So I pulled the controller off and will drive it up tomorrow. This was the best news I could have gotten!
Posted: Wed Jun 15th, 2016 01:11 pm
Back
from HPEVS. What a great group of guys. Don't judge, cause these guys
who are often found in T-shirts and shorts will happily impress you
with their knowledge and know how.
They warrantied the
controller and configured it with the settings as best as I could
remember. It will take some "fine tuning" ultimately dial in the regen
levels. I was playing it WAY to safe on the regen according to Brian @
HPEVS. Running temps of 100C is commonplace. And here I was getting
nervous when it would reach 75-80C.
I got there first thing in
the morning today and was amazed at the time they spent answering
questions and laughing at other "people" in the EV industry. Nothing TO
evil. Conversion cars is such a small slice of the HPEVS business. They
do way more business for the mining and golf car industry.
One thing HPEVS might have "sold" me on is a Orion BMS. It just makes sense long term to have one for so many reasons.
Tomorrow I will put the controller back on. I still have to get a replacement high voltage fuse.
Posted: Thu Jun 16th, 2016 09:37 pm
Today
I mounted the controller and did some wire cleanup underhood. Not alot
of progress as its been warm during the day and the car is currently in
my parents driveway, so not alot of shade. Also record temps are
expected for Monday so it would be nice to get the car mobile by then.
Tomorrow
I hope to string the long cable from the trunk to the motor. Then drive
to EVWEST and get a replacement high voltage fuse and borrow the Curtis
controller programmer for "fine tuning" over the weekend.
Posted: Sun Jun 19th, 2016 08:18 pm
I
must confess, not alot of progress has been made as of late. It's hot
and without the car in my garage, when I do find cool time its not as
easy as going downstairs to work on it.
I did string the long
cable through the car. And I used the cable that used to connect the
middle battery box to the trunk one for the underhood shunt to battery
box connection. I did this because I wanted to make use of the nice
gland nut that was already unused on the cable when I had it made.
Jack
Rickard recieved some new batterys private labeled for him under the
EVTV brand. They are 3.7v nominal instead of 3.3v for LiFe cells. It
would have reduced my batery pack size by 9 to 39 cells while reducing
weight 70lbs. They are also thinner but taller. I will be curious to
see them in upcoming conversion show builds.
I have to go to
EVWEST and get a new cable made for the middle battery box to trunk box
made, a high voltage fuse, and borrow the Curtis programmer, as weather
permits!
Posted: Mon Jun 27th, 2016 08:10 pm
Tomorrow
I hope to get the car moving. I have the programmer borrowed from
EVWEST to fine tune the Curtis controller. I need to clean the
terminals and strap everything up. All the batteries are in place. I am
starting to rethink bottom balancing them again. More on my thoughts
later.
Posted: Tue Jun 28th, 2016 09:24 pm
While
rearranging batteries my Dad saw that the battery box behind the seat
was lifting up as I was pulling batteries out. So tomorrow I will
investigate it further.
I need to get the Curtis programmer back
to EVWEST and already ask for an extension from Monday to tomorrow. I
will start early in the A.M. on the car and take it from there.
Posted: Sat Jul 2nd, 2016 08:43 pm
I
secured the battery box back down. The bolt was nowhere to be found. No
idea on that. I must have left it out the last time I took the box out,
and that was so long ago.
While I was at it I have taken the
time to look at the high voltage cables throughout the car. Of
particular interest and concern it the holes I have drilled through
sheet metal without proper protection other the the sheath on the
cables itself. So I have had gland nuts put on all but 1 cable because
I need it to go through a hole in the firewall. I will eventually get a
gland nut put on that cable but its not something that can be done
off-site and then install in the car. The car needs to be @ EVWEST in
San Marcos (30miles South) for that to happen.
Also for whatever
reason I have the positive lead to the charger starting the battery
pack behind the rear seats. So it went from behind the seats to the
trunk to under the hood. I had 3ft of high voltage cable I didn't need.
Along with that goes a long charger positive cable. So I reconfigured
everything to START the battery pack in the trunk, next to the charger
and then END it right by the shunt under the hood. I think what
happened is I originally had 2 packs early on and never redid the
wiring when I added the final third pack. Whatever the reason, its
fixed now and looking great.
I also rerouted 1 of the battery
connections from the box inside the car to the trunk through the left
rear fender from inside the car. Basically where the fuel filler tube
goes. This way its not right next to the other cable going to the
battery box under the sheet metal near the rear window. It was only a
small opening to get both those cables through and I never liked them
right next to each other.
I returned the Curtis programmer to
EVWEST on Friday because I didn't know how long this wiring was going
to take me, and I didn't want to put them out in case they needed it.
I still have to drill a hole in the trunk battery box for the charge wire and JLD404 meter signal wire.
Posted: Tue Jul 5th, 2016 08:06 pm
I
have the last high voltage cable with a single gland nut put on @
EVWEST today. While I was there I decided to invest in better
instrumentation then the trusty JLD404 meter. It's a Xantrex LinkPro
TBS e-Xpert Pro Battery Monitor. It will mount in a A pillar gauge pod
as soon as I can locate one.
So just tidying things up. I had
gotten everything about buttoned up when I noticed the black Gigavac
contactor that came with the HPEVS kit was locked on. I called Brian @
HPEVS and he said to hit it a couple times which I had already done. He
said if that did'nt work to bring in by and he would warranty it (super
nice guy). So unable to hit to contactor with enough force bolted down
to the electrical box I snipped in wire off and removed it from the
box. Only then would I smack the whole contactor down on a flat
concrete floor. After doing so, it disengaged!
But I do have to put everything back the way it was, as well as clean up all the wiring I removed to diagnose problems.
Posted: Thu Jul 7th, 2016 10:37 pm
I
went to EVWEST for a new set of charger cables. I usually show up
around lunch time out of coincidence and never bring food! Trent was
super nice to drop everything and make a set of cables. Really
appreciate that!
This new cable involves drilling a hole on the
rear battery box and making the hole in the underhood electrical box
bigger for the cables gland nut.
Then instead of putting the
cable lug in the top of the copper bar I made I am going to mount it
upside down so I don't put unneeded stress on the cable by making it a
tight angle.
I am having difficulty locating a single pod A
pillar gauge for the Del Sol. I guess everyone wants to monitor at
least 2-3 items at once.
And after talking with EVWEST I decided
to take HPEVS up on the offer to warranty the contactor I got to
unstick. The growing theory is after it sticking once its WAY more
likely to stick again. Something about the points becoming worn. So why
risk it. Tomorrow morning I will drive up to HPEVS and see Brian. I
offered and have a package I need to drop off to them from EVWEST
anyhow.
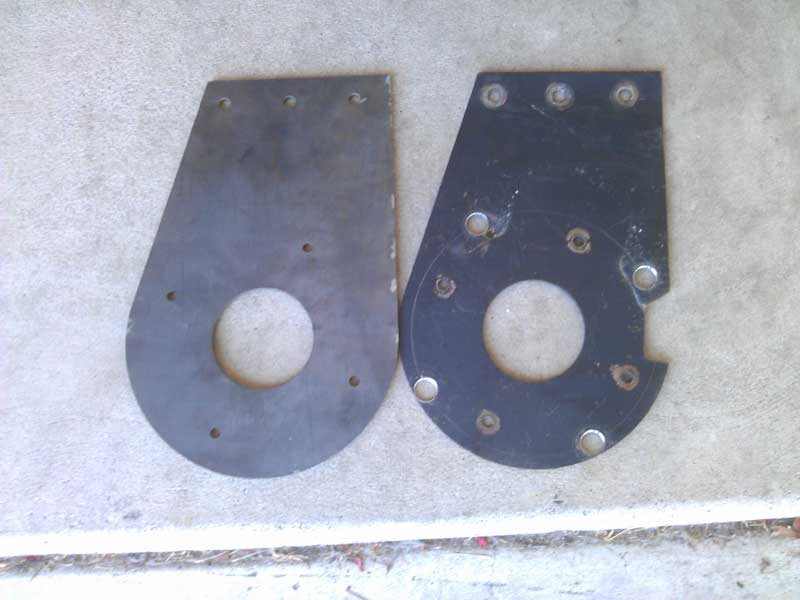
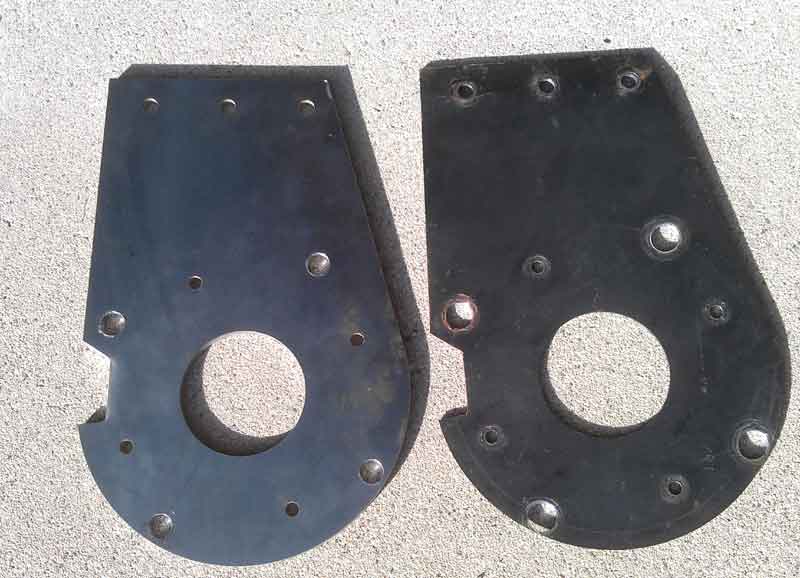
I also picked up a new 1/4" thick motor mount plate from EVWEST. I really cant see bending this one!
Old charge cable:
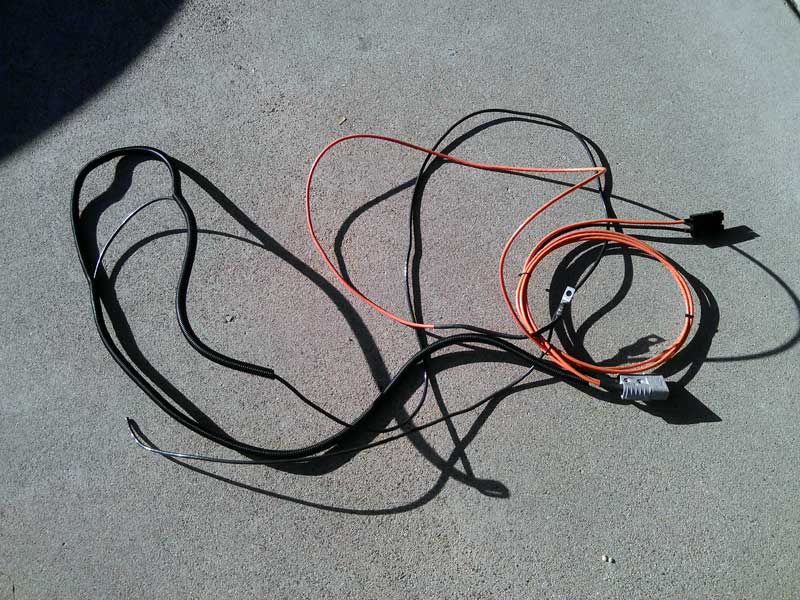 +
+
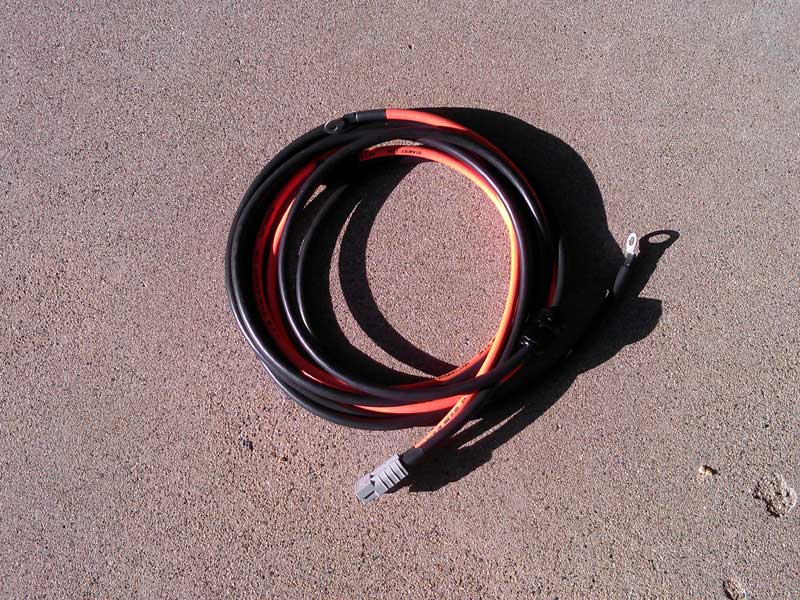
New charge cable:
Rear battery box gland nuts:

Posted: Sat Jul 9th, 2016 10:27 pm
Just dragging my feet some more....
I
did decide to replace the motor mount plate at the end of the motor
with the new one I had made. However I failed to remember that I had to
redrill holes for the AC51 motor and cut out a space for the transcoder
cable. Normally I would do this myself but the thought of cutting 1/4"
steel with a huge drill bit did not excite me. So I will return to
EVWEST Monday to have the plate modified with a waterjet.
Existing mount is on the right:
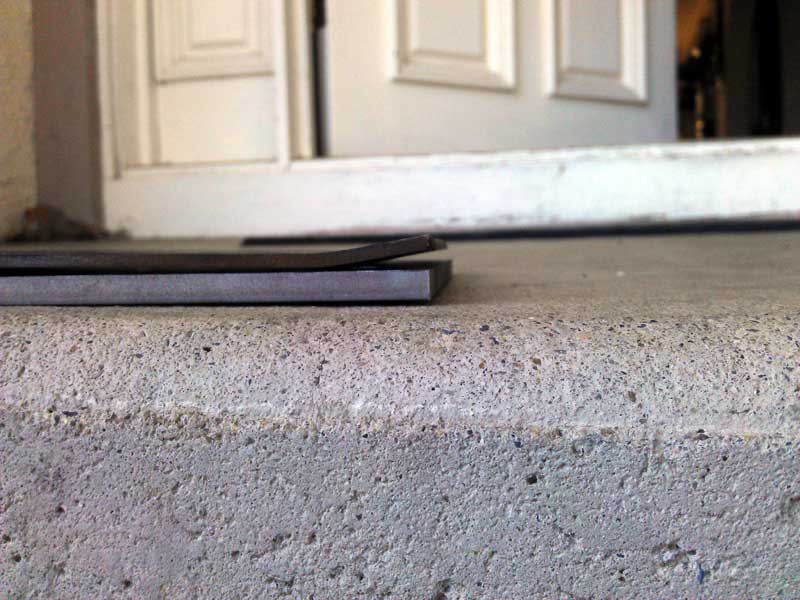
Old plate on top of new plate was visably bent:
Posted: Tue Jul 12th, 2016 05:10 am
I
drove to EVWEST yesterday and Trent modified the new motor plate. I
learned once the part is cut from the larger plate it is very difficult
to get jigged up accurately. Because of this, everything was done by
manually. I also had to get 1/4" longer motor bolts to be safe.
I
also drilled and installed the new charger cable. It was harder then it
looks. And despite its appearance the cable is not strained from being
bent around.
Posted: Thu Jul 14th, 2016 10:38 pm\
I finally got to a point to try and turn on the car.
The
display indicated a "CODE 14" error. After some research it has
something to do with the precharge circuit. I will research it.
Posted: Fri Jul 15th, 2016 08:37 pm
It's alive!
I
quickly determined the error code was from the precharge circuit not
being hooked up. I hooked that up and immediately got a code for the
throttle wiper signal. I quickly realized the it was unplugged.
The car then started up. One minor issue. I now have 4 reverse gears and a single forward gear (reverse)!
I
need to change the motors rotation in the controller. I thought HPEVS
had set this up for me before I got the controller but I don't know.
The other workaround is to hookup the other direction wire on the
controller. But I have everything wrapped up, and I need to set the ROM
limit to 7,000 anyhow. So I drove to EVWEST and borrowed the Curtis
programmer. I changed everything I need to but I can't find motor
direction. I think its because the access control level on the
programmer is on "User" and it needs on "OEM". I will work on that
tomorrow.
Posted: Sat Jul 16th, 2016 07:50 pm
The
car runs as it should now. I cheated a little bit and instead of
cutting and redoing the wiring, and since I could not find the setting
for motor direction in the programmer tool. I simply swapped the #22
White wire and the #33 Yellow wire for the motor direction at the
Curtis controller plug. I was able to slide the pins out of the
connector, and other then being the wrong color it works fine.
I
can't explain it and maybe its because I have been driving the smart
car so much but it "seems" quieter. I am thinking it's the Hz setting
of the controller.
It's downstairs charging, and I have to
watch it because I don't have the JLD404 hooked up to trigger a relay
for the charger enable signal yet. It just takes me running a single
wire to the JLD404. Come to think of it, I might as well run that wire
now.
Posted: Mon Jul 18th, 2016 11:54 pm
The
car is performing well! I had mentioned to my Dad the car appears
quieter. At a certain RPM before I would get a faint rattle. He made an
of-the-cuf remark that maybe it was the new motor plate. There may be
something to that as that was the only part changed from before the
controller issue.
Either way I am happy with how it came out.
Posted: Tue Jul 19th, 2016 10:07 pm
Another
added benefit of this new motor mount is reduced torque steer. My first
3 cars where FWD vehicles so I am all to familiar with the trait. This
reason for this new improvement is probably two fold. One is the simply
thicker material of the plate. Secondly is because the motor holes
where drilled with much tighter tolerances.
I am trying to put
together why the motor is quieter now. Could the the previous thinner
metal mount have been resonating acoustically?
Posted: Sun Jul 24th, 2016 10:39 pm
The car is great and I am happy with the way things are for now.
Other
opportunities have presented themselves and I am taking advantage of
them. Until then I am going offline for awhile as this will become a
full time effort. I will leave this website in an stale state as a
point of reference for anyone looking for conversion information.
© TechVelocity